Make fun-size Skittles, M&Ms and other bagged candy replicas for your dolls this Halloween!
We have a yummy tutorial for you today!
We had so much fun making realistic, doll-scale candy for our BIG Halloween Party Pictorial a few years ago, so this year we decided to make wee replicas of EVEN MORE of our favorite candies for our 18 inch dolls to enjoy.
As we covered poly clay candy corn and fun-size candy bars in our previous tutorials, this year we decided to explore a different style of wrapped candy — bagged candies, like our designer's favorites: M&Ms and Skittles!
Want to make some now? Gather the following supplies and follow along with our step-by-step directions below:
• At least TWO bags of each candy you want to reproduce
• A craft knife and / or sharp paper scissors
• Clear tape
• A scanner
• A computer layout program that allows you to shrink images and place multiple images on a page (InDesign, QuarkXpress, Word, etc.)
• A color printer and ordinary 20 lb white paper
• Fast drying craft glue, such as rubber cement or Aleene's Fast Grab Tacky Glue
• Toothpicks
• Inexpensive seed beads (size 10/0 or 11/0), and finally —
• One US quarter
Step 1 — Choose your candy and prepare a wrapper to be scanned
Rather than trying to peel the front and back pieces of a candy bag apart, use two bags: one for the front and one for the back.
With your craft knife or scissors, make a slit on the front side of one bag and the back side of the other. Remove the candy and flatten the two bags.
With the slit sides facing up, tape the bags together along one long side. Tape as neatly as possible, matching the edges and leaving no gaps between the bags.
Step 2 — Scan, prep and print your wrappers
Flip the taped-together wrappers over. This un-taped, un-slit side will be the side you scan.
Your scanner or all-in-one printer should have software that allows you to import the resulting image to your computer. If not, there are many free image capture programs available on the web — such as Image Capture, the software we used.
Once you have the image on your computer, drop it into a layout program (such as InDesign, QuarkXpress or Word) and shrink the image down to 30%.
That's THIRTY PERCENT.
If you are wondering why we chose that number, it's a compromise between the 33% scale of the 18 inch dolls as a whole, and the 25% scale of their bodies without their giant heads.
If you're interested in learning more about choosing the right scale for 18 inch doll furniture and props, check out our popular Pull Up A Chair: A Question of Scale newsletter entry HERE.
In your layout program, place as many of the 30% images as you can fit on a page and then send the page to a color printer loaded with ordinary 20 lb white paper.
Step 3 — Cut and glue your wrappers
Using your craft knife or sharp scissors, cut out each wrapper.
We like to cut just along the tips of the tiny serrations on each edge, which leaves a little visible white in your finished candy wrapper. In our experience the eye notices the realistic quality of the colored serrations more than it notices the white, so that's okay.
Fold each wrapper in half and pinch the long folded edge.
With a toothpick, apply a thin line of fast-drying craft glue to the inside of the wrapper along THREE edges: BOTH long edges (INCLUDING the folded edge) and ONE short edge.
Leave the remaining short edge open so you can add the filling in the next step!
NOTE: Make a mental note of which edge is open, as it will be really hard to tell once the other edges are glued flat!
Press the folded wrapper flat, pinching the glued edges together firmly. Let the glue dry for a minute or two.
Step 4 — Fill and close your bags
The key element to making realistic wrapped doll candy is to include something inside the wrapper that creates the same 3-dimensional effect as the candy.
In our previous fun-size Halloween candy tutorial, we used small buttons, barrel beads and pieces of craft foam to mimic the different types of candy.
For this tutorial, we are using inexpensive seed beads (size 10/0 or 11/0) from the craft store to mimic the M&Ms and Skittles inside the bags.
With a clean toothpick, ease the unglued edges of your bag apart and pinch the edges open.
Using a tiny scoop or spoon, pour beads into each bag until there are enough to make a nice 3-dimensional bump, but not so many that you can't pinch the edges closed again.
Using a toothpick, apply a thin line of glue along the top edge inside the bag and pinch the bag closed.
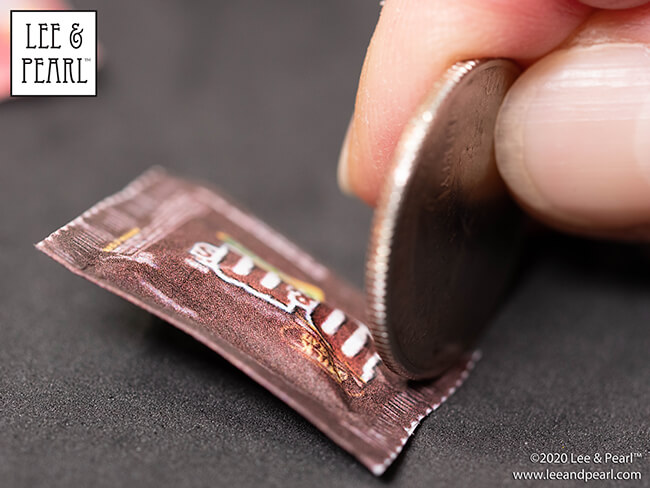
Step 5 — You're almost done, but there's one more step!
We've found that with miniature replicas, sometimes it's the unexpected details that matter the most.
For example, look at the picture above. Do you notice the light reflections off the ridged edges where the candy bags were machine-crimped together? The scanner picked up those reflections, but we thought it might help seal the realism of these tiny bags to replicate the actual ridges.
Can you think of a readily-available tool that could make ridges exactly that size when pressed into paper? Hmm...
You got it — a QUARTER.
Just grab a quarter and roll the ridged edge firmly along all four edges on both sides of your candy bags. Neat, huh?
While you're at it, pinch the finished bags and crease the edges up and down to wrinkle them. Real candy bags get tossed around quite a bit and you'll find that a little effort re-creating that wear will pay off in making your doll versions look extra realistic!
That's it — grab a tiny bowl and enjoy your doll candy!
Want to follow a LIVE VIDEO version of this tutorial instead?
CLICK HERE to follow along as designer Pearl makes these candy bags in real time on our Facebook page
Then go ahead and make the full range of candy bars and candy corn from our other Lee & Pearl video tutorials...
CLICK HERE to watch our candy corn and candy bar video tutorials on the Lee & Pearl YouTube channel
CLICK HERE to read our Halloween Party Extravaganza newsletter, with lots of costume and prop links and tutorials
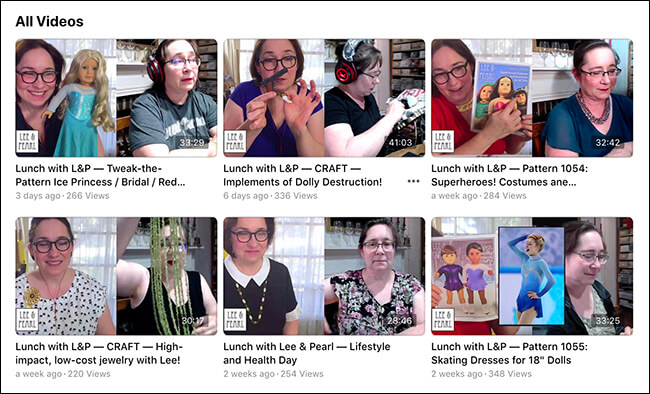
Spooky spider earrings, microwave caramels, autumn-scented lip balms and painted dragon taxidermy — find these tutorials and more for dolls AND PEOPLE during our Lunch with Lee & Pearl LIVE Facebook video series.
Tune in Monday, Wednesday and Friday at 2pm Eastern, 1pm Central, 12pm Mountain and 11am Pacific to join our LIVE video broadcasts on Facebook.
CLICK HERE to go to the Lee & Pearl Facebook page to join us LIVE on Monday, Wednesday and Friday at 2pm Eastern, 1pm Central, 12pm Mountain and 11am Pacific.
If you can't make the live videos, no worries. You can re-play the broadcasts at any time, or catch up with any of our other videos in our Facebook video archive.
CLICK HERE to go to the Lee & Pearl Facebook Video Archive to catch up on any Lunch with Lee & Pearl episodes you may have missed!
Want pattern announcements, tutorials and behind-the-scenes news from Lee & Pearl delivered directly to your inbox — along with our exclusive FREE pattern for subscribers? Click below to join our mailing list!
CLICK HERE to sign up for the Lee & Pearl mailing list.


— back to the Newsletter Archive —
![]()